Ogmore-by-Sea - The Bonus Trench
From South Wales Bouldering Guide Wiki
(Difference between revisions)
(→Problems:) |
|||
| Line 14: | Line 14: | ||
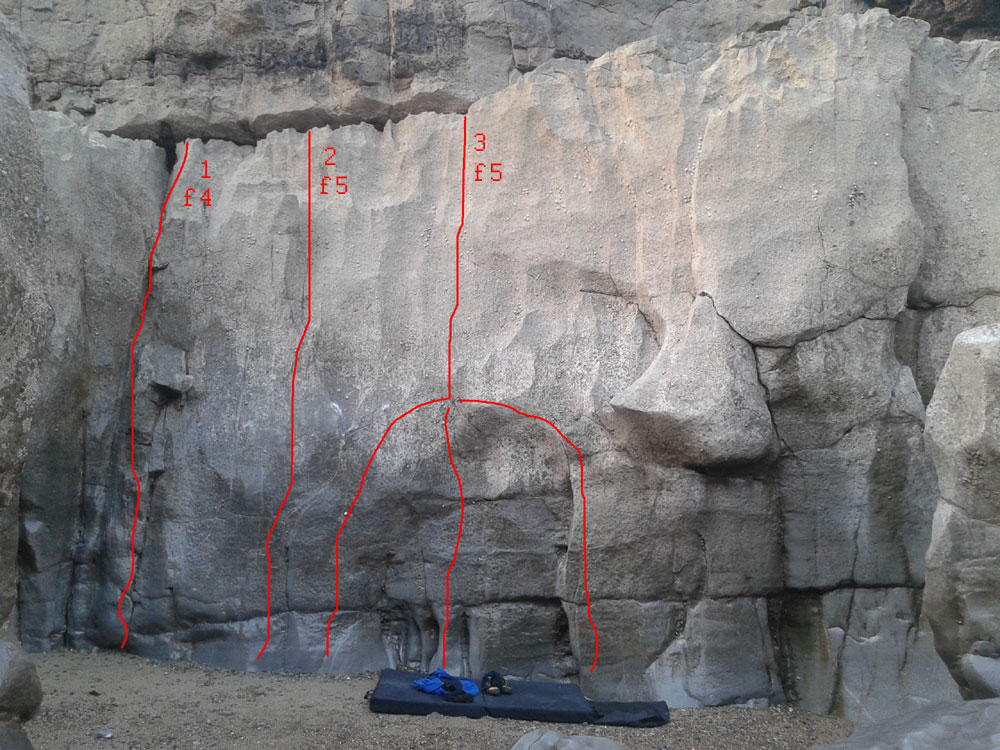
#'''f4''' Easy way up/down | #'''f4''' Easy way up/down | ||
| − | #'''f5''' Wall starting with right hand in the small runnel (chalked in photo); groove higher up | + | #'''Severn Bridge f5''' Wall starting with right hand in the small runnel (chalked in photo); groove higher up |
| − | #'''f5''' The hanging layback arete can be started any of three ways - from the small runnel, direct by jumping to the jug below, or from the right. The latter is probably harder if you avoid using the runnel as a foothold (f5+?) | + | #'''Delamere Leighback f5''' The hanging layback arete can be started any of three ways - from the small runnel, direct by jumping to the jug below, or from the right. The latter is probably harder if you avoid using the runnel as a foothold (f5+?) |
Revision as of 21:12, 22 May 2013
Back to Ogmore-by-sea
Description
As for the Trench; this is the second inlet about 20m to the East of the Trench. Scramble or walk around at low tide. Being considerably wider, it is perhaps quicker drying than the Trench. There is scope for more development.
Back Wall
Problems:
The following problems finish at the break - traverse off or downclimb Problem 1.
- f4 Easy way up/down
- Severn Bridge f5 Wall starting with right hand in the small runnel (chalked in photo); groove higher up
- Delamere Leighback f5 The hanging layback arete can be started any of three ways - from the small runnel, direct by jumping to the jug below, or from the right. The latter is probably harder if you avoid using the runnel as a foothold (f5+?)
